
Audio tracks, or even worse, whole songs, that have no fades are really hard to listen to.
Even if audio is secondary to you, having some proper fade ins and fade outs on your music goes a long way.
Luckily, there is free software out there that will make it as easy as possible for you to create smooth fade ins and fade outs.
For instance, if you are on a Windows PC, you can use Audacity to create fade ins
and fade outs.
If a MAC is your weapon of choice, then you might want to make your fade ins and fade outs with Garageband, as this awesome piece of software comes preinstalled on every MAC.
In today’s article, we are going to have a look at how to perform fade ins in Garageband. In case you are looking for fade outs instead, then please rest assured that fade outs work in the exact same way (but in reverse of course).
How to Fade In Audio in Garageband
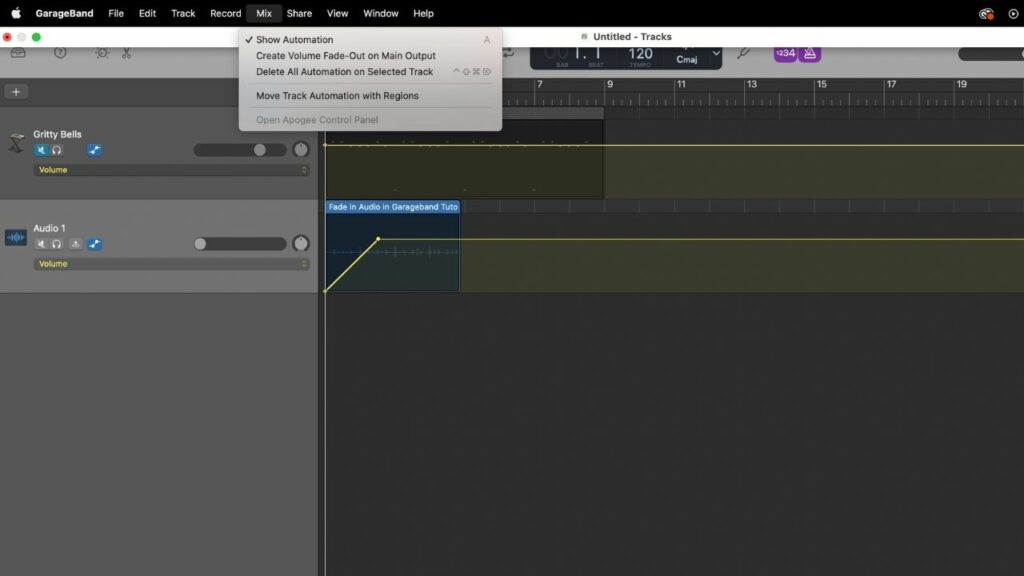
To fade in audio in Garageband, you will need to use “Automation.” Click on the audio track that you wish to fade in, then click on “Mix” in the main menu and choose “Show Automation.” Now, choose the “Volume” parameter from the automation dropdown menu. Now, to fade in audio, click on the audio track twice. The first time you click on it, a yellow automation line will appear. The second time, a yellow dot will appear on the automation line. To fade in audio, make sure to drag down the first yellow dot on the automation line. Typically, you will want to drag the first yellow dot to the beginning of the audio track, so that the audio track will fade in, starting from the very beginning.
Fade In Audio in Garageband – Step-by-step Guide
Step 1: Enable Automation. Click on “Mix” in the main menu and then choose “Show Automation.”
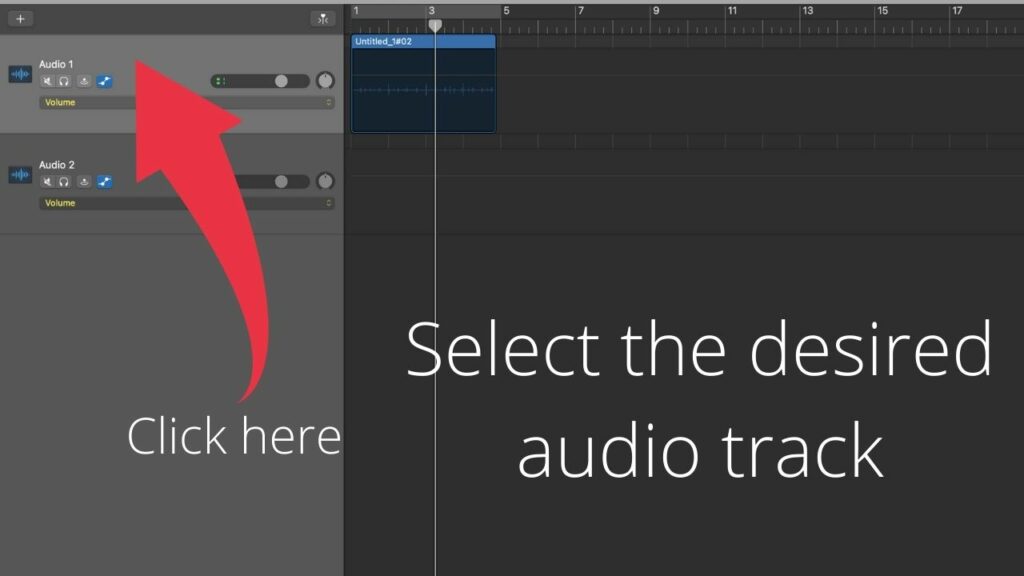
Step 2: Select the desired audio track.
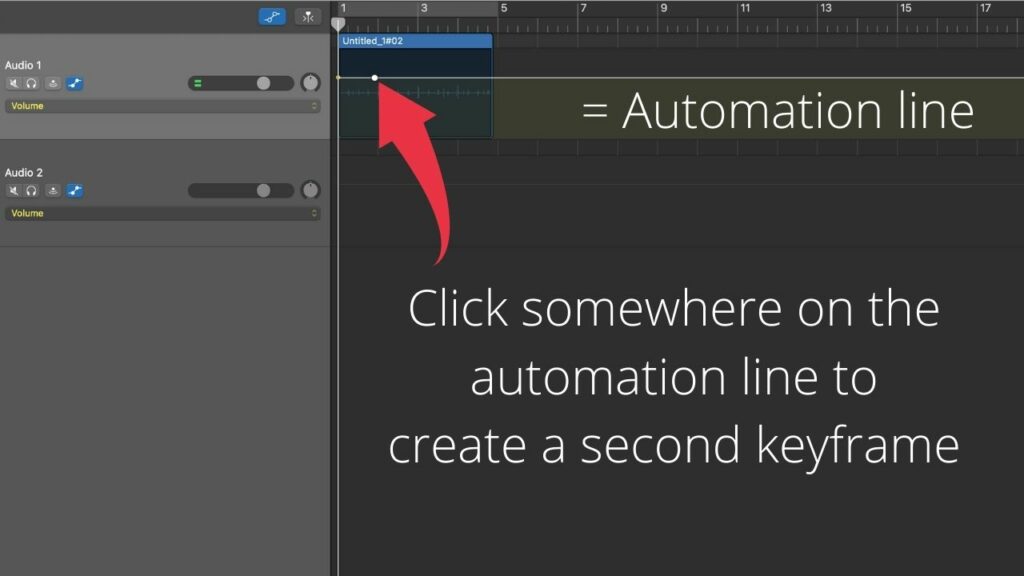
Step 3: Make the yellow automation line appear. Click on the audio track to make the yellow automation line appear.

Step 4: Create a second keyframe. Click on the yellow automation line to create a second keyframe (the first keyframe appears automatically on the automation line after performing Step 3)
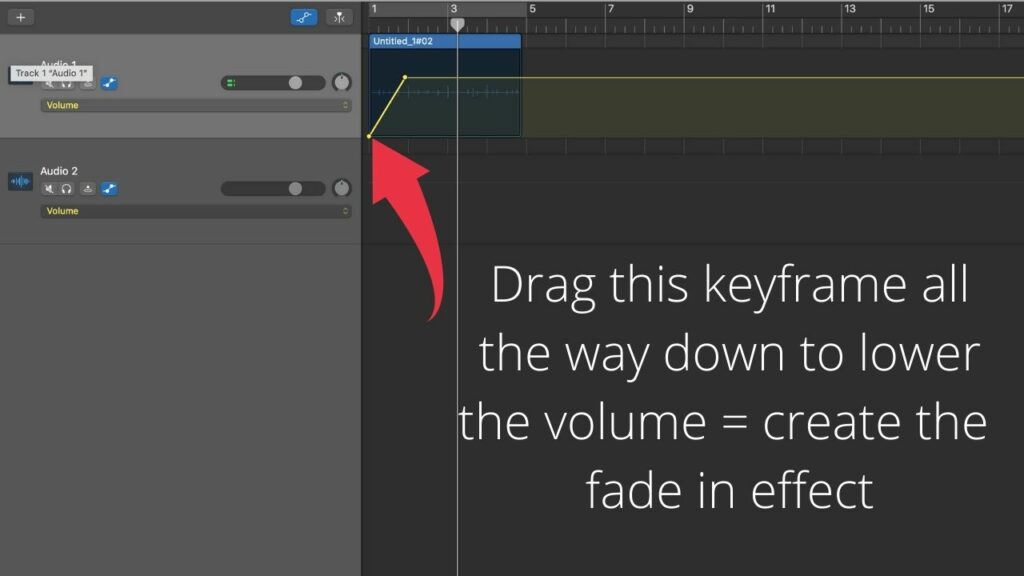
Step 5: Lower the volume of the first keyframe. Drag down the first keyframe at the very beginning of the audio track to lower the volume and to create the fade in effect.
How to Fade in the Master Track in Garageband
Now, we have just seen how to fade in individual tracks in Garageband. But how would you go about fading in all tracks at once (= fading in the master track)?
That’s actually an easy feat as well.
To Fade in the Master Track in Garageband, first make sure that the Master Tracks is visible on the screen. To do so, click on “Track” in the Main Menu followed by “Show Master Track.” Now, to fade in the master track, it works exactly in the same way as fading in individual audio tracks in Garageband (= Click on “Show Automation under “Mix” in the main menu, then click on the audio track of your choice to see the automation line, then click again to set a new timeframe and then drag the first timeframe down to create the fade in effect.
How to Fade in the Master Track in Garageband: Step-by-step Tutorial
Step 1: Make the Master Track Visible.
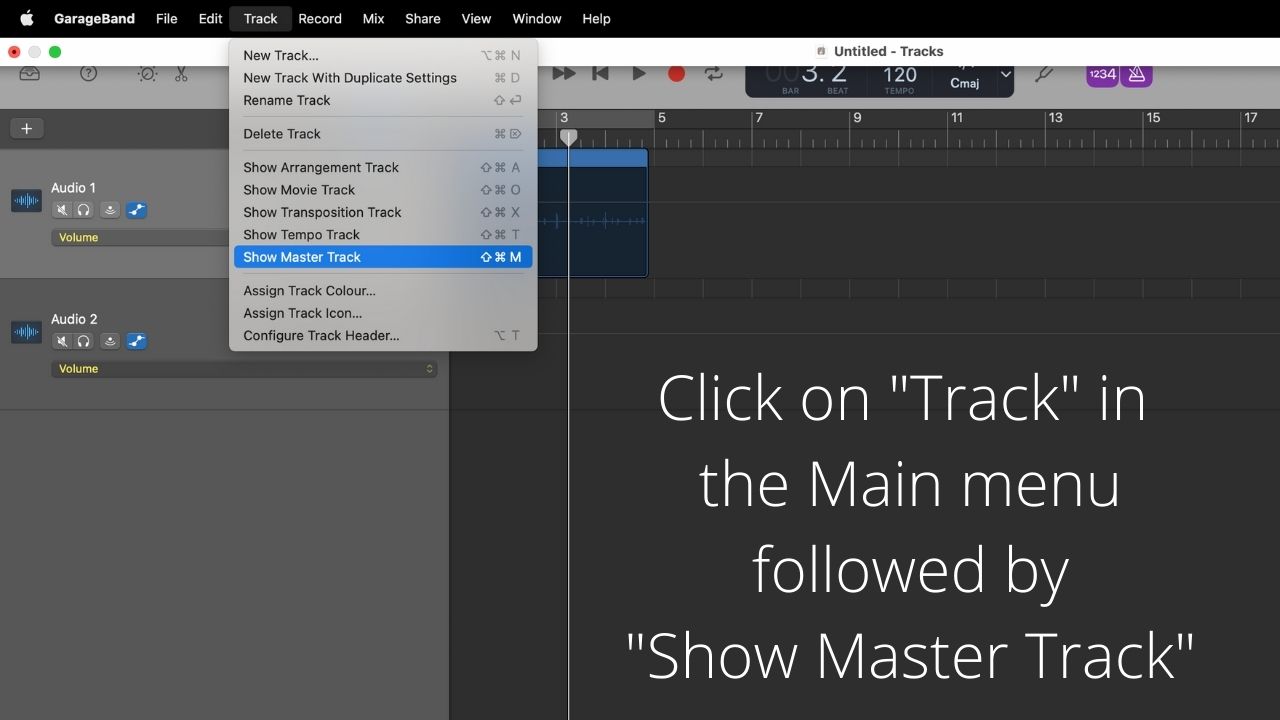
To make the Master Track visible, the first thing you need to do is to go to the main menu and then select “Mix”, followed by “Show Master Track.”
Step 2: Choose Volume from the Automation Dropdown Menu.
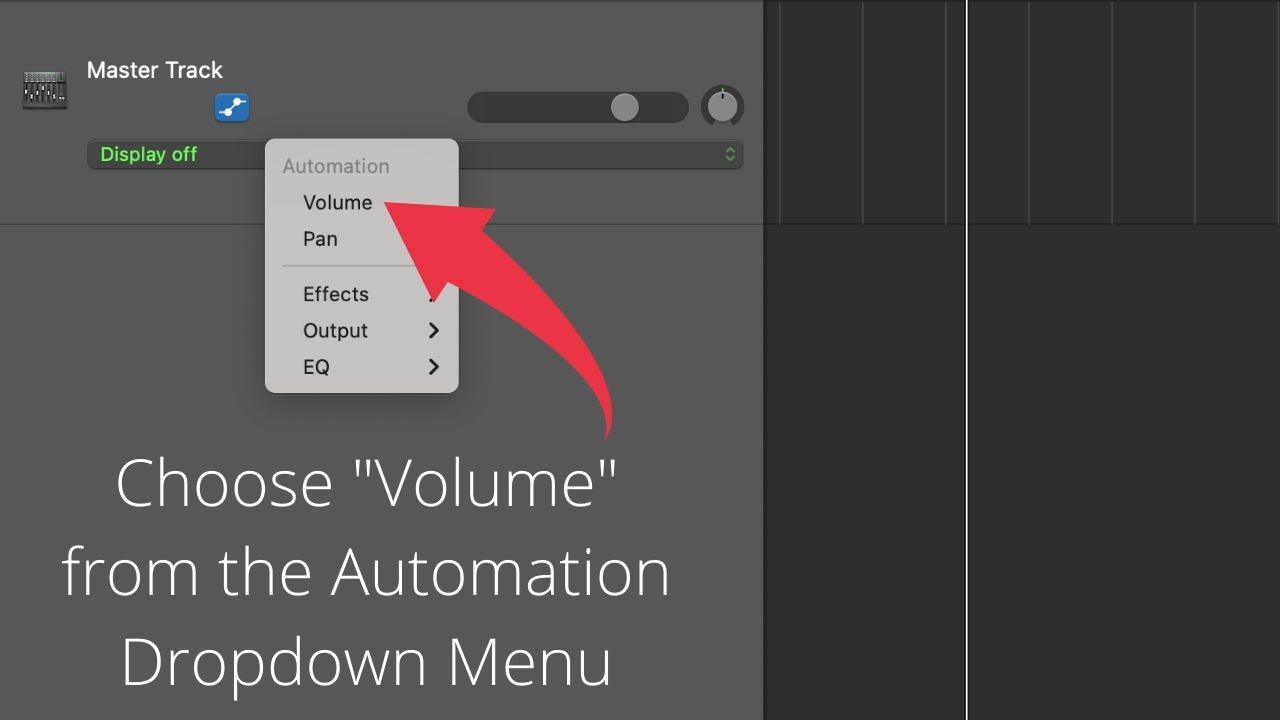
As we would like to perform a fade in, we need to select “Volume” from the Automation dropdown menu.
Step 3: Make the Yellow Automation Line Appear.
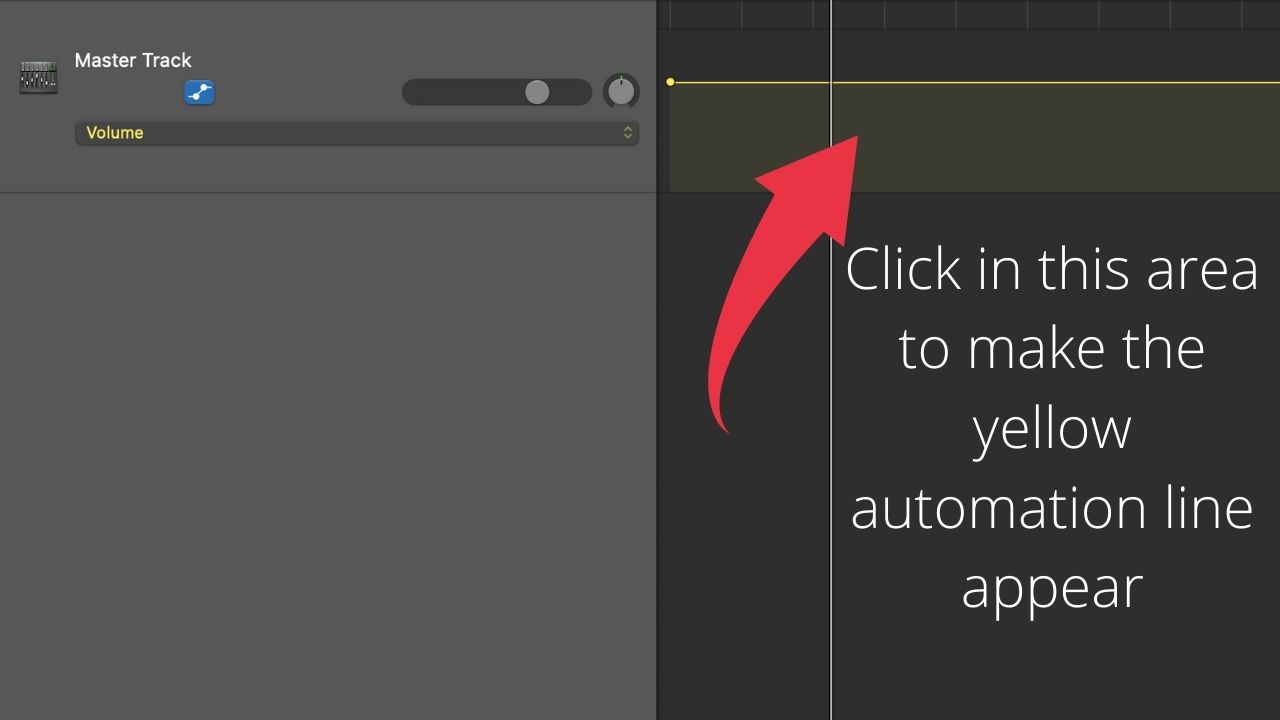
In order to make the yellow automation line appear, please click somewhere on your audio track (in the dark grey area on the right side!)
Step 4: Create a second keyframe/timeframe.
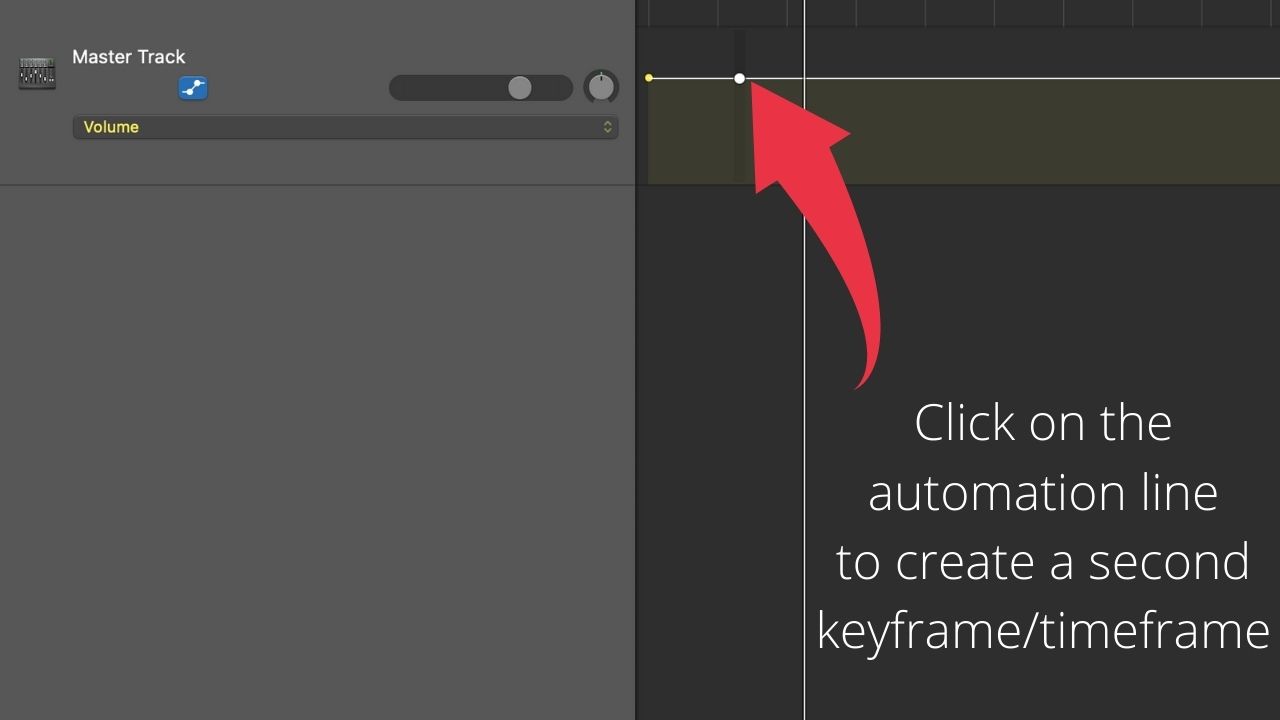
To create a second keyframe (the first one at the very beginning of the track appears automatically), click somewhere on the yellow automation line. You can adjust the position of the second keyframe at any time by simply dragging it left or right on the automation line.
Step 5: Drag the First Keyframe (all the way) down.
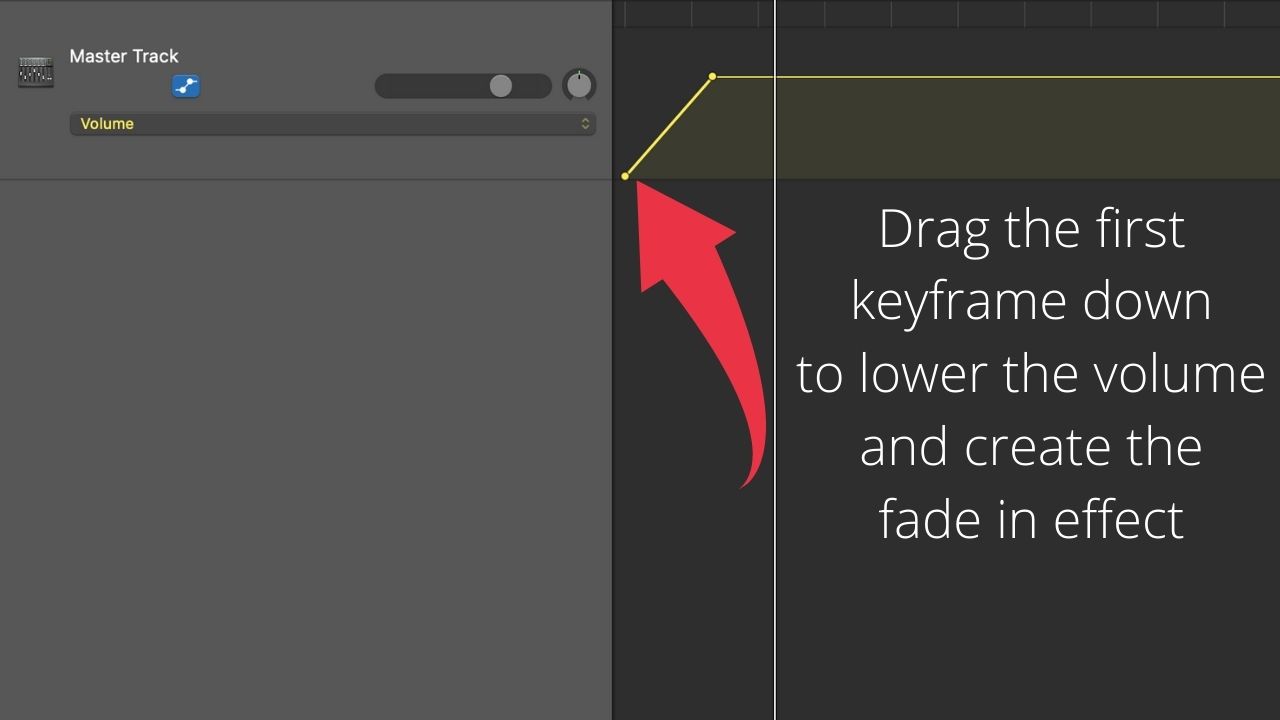
In order for us to perform the fade in, we need to make sure that the first keyframe is placed lower than the second keyframe. Simply drag the first keyframe down to lower the volume and to create the fade in effect. If you drag the first keyframe all the way down, the fade in will start from silent (which is most probably what you want).
Frequently asked questions on how to fade in audio in Garageband
How do I fade in a Software Instrument in Garageband?
Fading in software instruments in Garageband works in the exact same way as fading in regular audio tracks. This means that you will need to use “Automation” to create the fade in. To do so, click on “Show automation” under “Mix” in the main menu. Now, make sure to choose “Volume” from the automation dropdown menu. Then, click twice on the software instrument track to both create the yellow animation line and to create a (second) yellow dot on the automation line. You can then drag the dots around. Make sure to drag down the first yellow dot, so that it is in a lower spot than the second yellow dot (=creates the fade in effect).
How to fade in individual tracks in Garageband?
First, make sure to activate “Automation” under “Mix” in the main menu (= Click on “Show Automation” there). Then click on your audio track twice to get the yellow automation line and to set a second keyframe. You can then move these keyframes around and drag the first keyframe down to lower the volume and create the desired fade in effect.
cymbalta and elavil
Monday 6th of January 2025
cymbalta and elavil
cymbalta and elavil
cialis online without pres
Friday 12th of January 2024
cialis online without pres
cialis online without pres