How to Fade in Audio in Premiere Pro?
To fade in audio in Premiere Pro, you have to make use of keyframes. You can either do so by setting keyframes directly on your audio clip by pressing and holding CMD on your keyboard and then left-click on the horizontal line on your audio file (horizontal dB line) or by setting keyframes in the Effects panel (takes more time).
Fade in Audio in Premiere Pro the Easy Way
As we have just seen, there are actually two different ways to fade in audio in Premiere Pro. Let us first talk about the easier (and also faster) method to make quick fade ins to your favorite audio tracks. The following step-by-step instructions will make your life very easy.
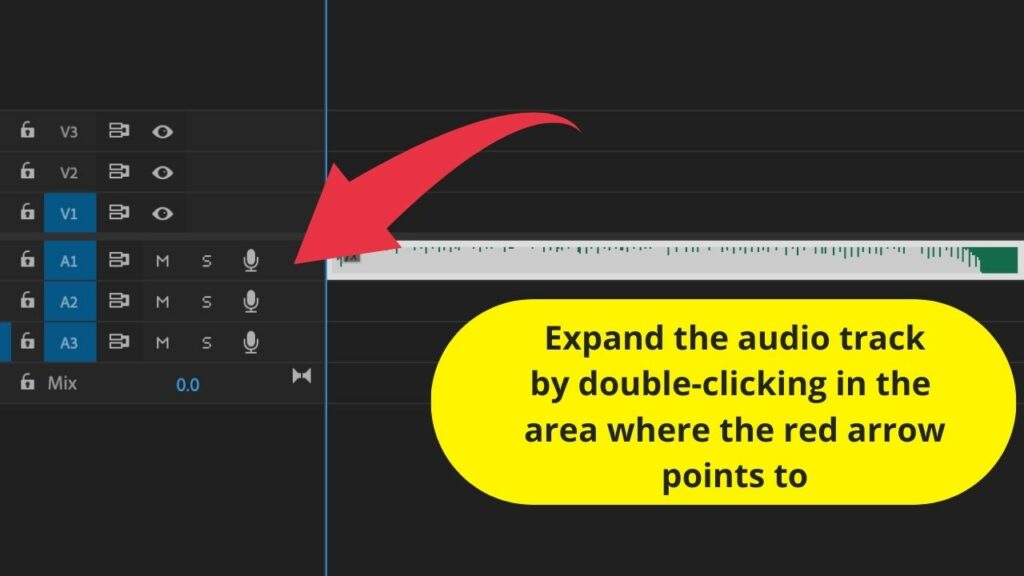
Step 1: Double-click on your audio track in the timeline to make the audio track and the audio clip bigger
Step 2: Left-click on the audio clip to select it.

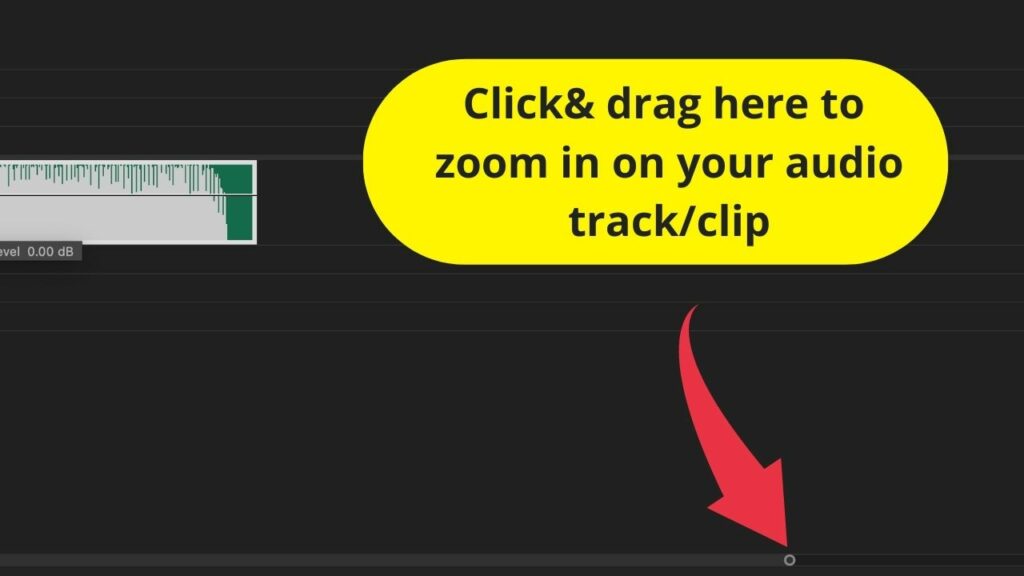
Step 3: Zoom in on your timeline to see things better. In order for us to set perfect keyframes, we have to zoom in on the timeline, so that we can see our audio better. You can do so by either pressing Alt + Mouse Wheel or by clicking & dragging the little circle symbols on the bottom of your screen. Zoom in a lot, about 85% or 90% should do.
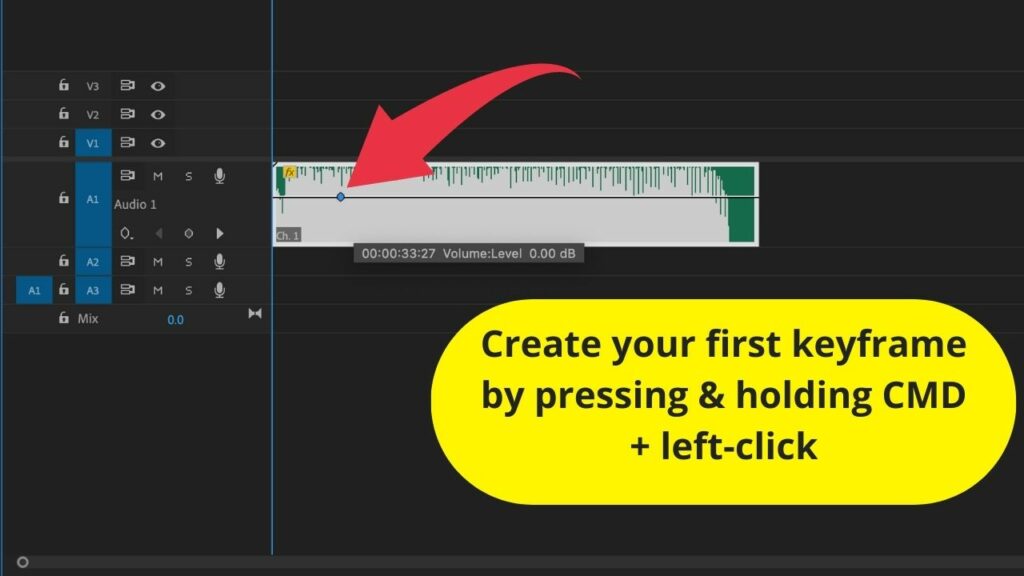
Step 4: Press & hold CMD + left-click to set a keyframe. Doing so, set the starting keyframe (set it to – infinite to mute the clip completely to start with). As keyframes can easily be moved later on, it does not really matter where exactly you set it in your audio clip but just know that later on you will want to move that to the very start of your audio clip.
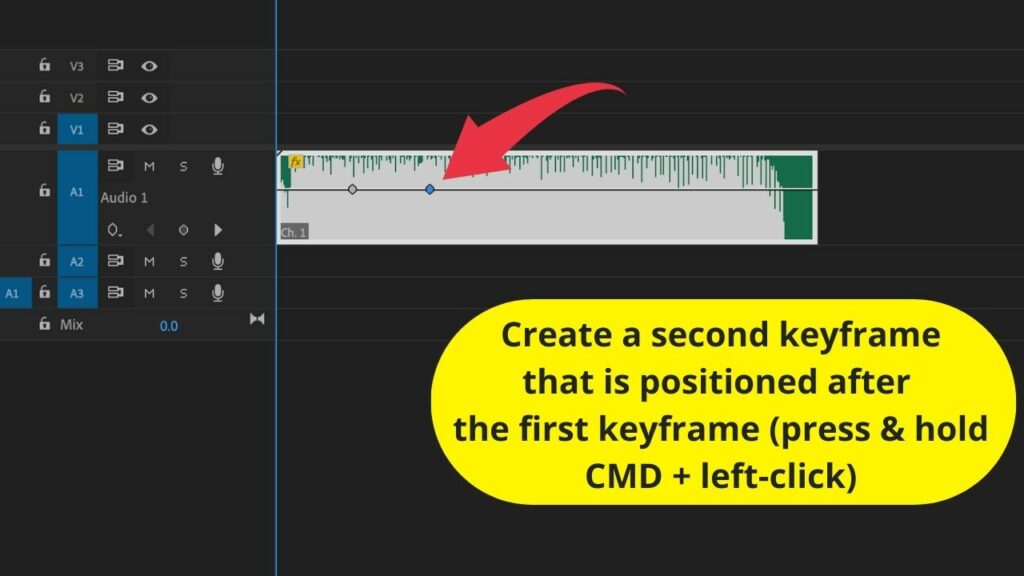
Step 5: Press & hold CMD + left-click to set the second keyframe. The second keyframe represents the regular volume that you would like to have for your audio clip (typically this would be around 0 dB). Here again, it doesn’t matter where exactly you create this keyframe on your audio clip, as we can easily move it around later on. However, this second keyframe should be set at a later point as your first keyframe, as it marks the endpoint of your fade in.
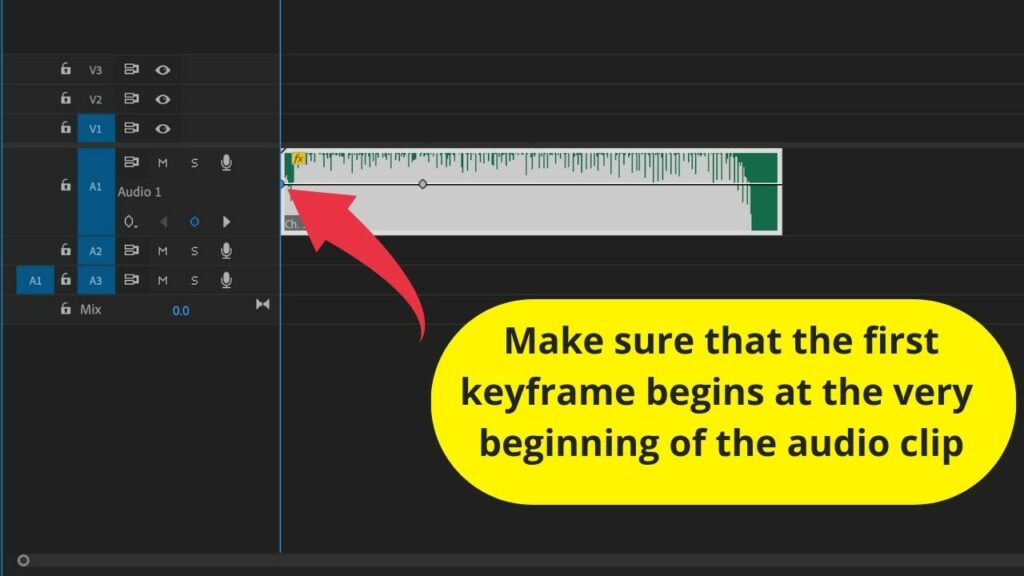
Step 6: Now, move the first keyframe to the very beginning of the audio clip.
Step 7: Click & hold on your first keyframe and drag it down. Typically, you would want to drag your audio keyframe down as much as possible, so that it will start completely silent (= minus infinity). The more you drag it down, the less the volume will be.

Fading in Audio in Premiere Pro the Classic Way
Instead of fading in audio in Premiere Pro by inserting keyframes directly into the audio clip in the timeline, you can also add your keyframes in the Effects panel.
This is probably what most people do. It works just as well. However, I would say that it is a bit slower. That said, if you are fading in/out audio a million times (as I do), speed is key. And that is why I prefer method number 1 to add fade ins in Premiere Pro as outlined above.
If you do prefer doing some work in the effects panel, though, here’s how you do it.
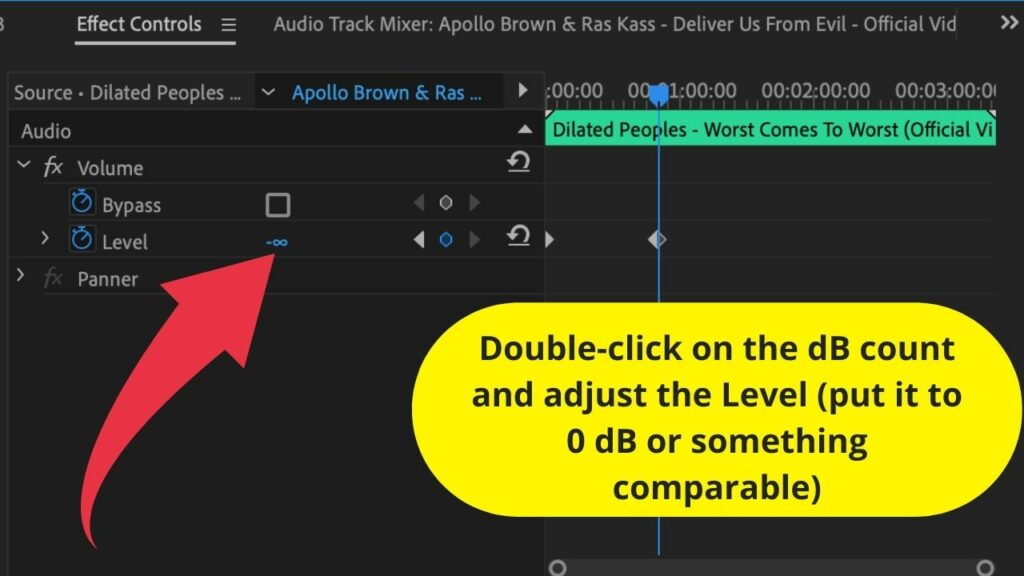
Step 1: Open up the “Effect Controls” panel. Make sure to go into “Effect Controls”
Step 2: Open up the Volume drop-down menu. Click on the right-arrow on the left side of where it says “Volume”.
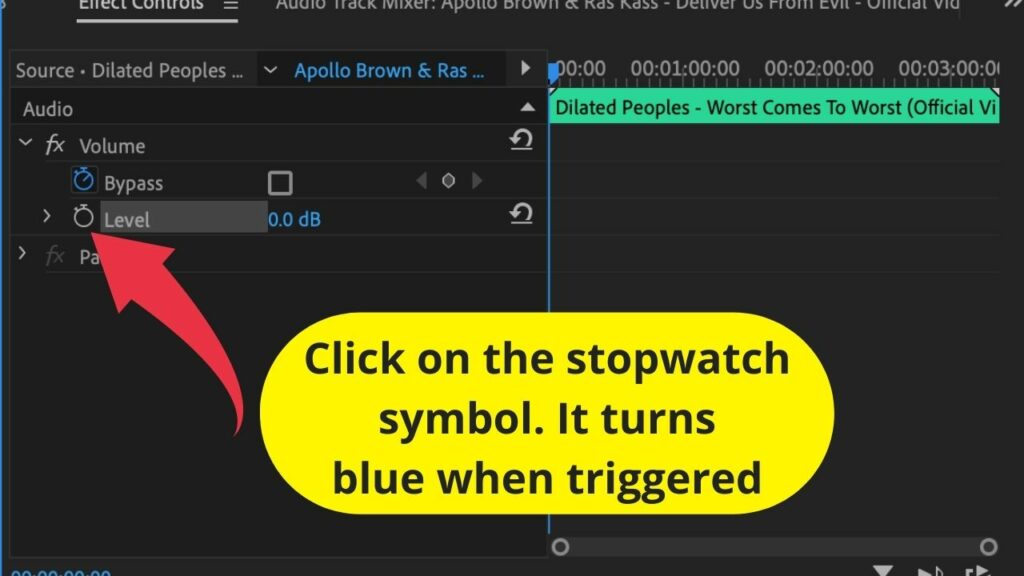
Step 3: Activate Animations. Click on the Stopwatch symbol. It will then turn blue.
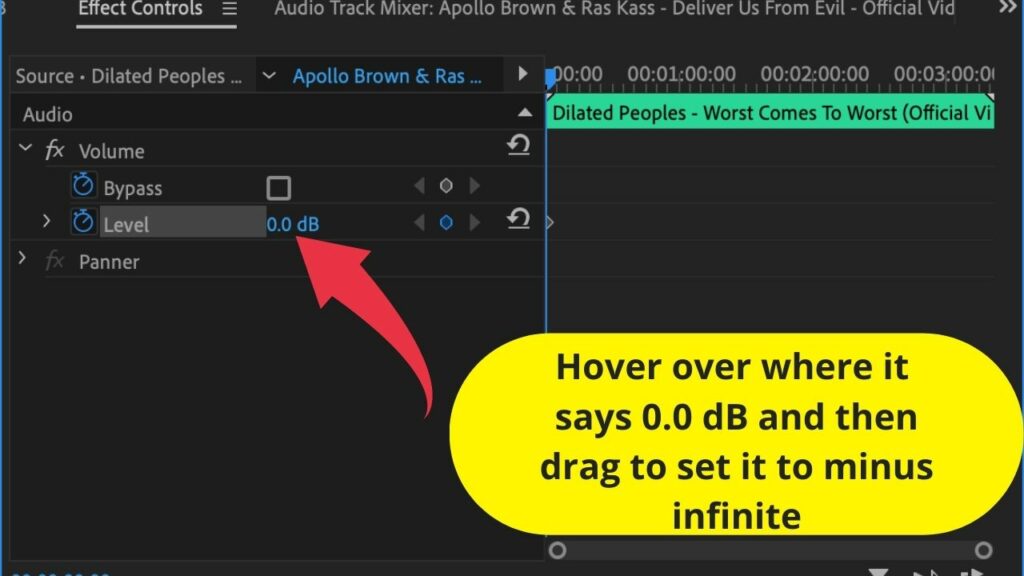
Step 4: Lower the volume to minus infinite. You can do so by hovering over the dB display and then by just dragging down with your mouse as much/long as you can. You should then see the first keyframe in your Effects timeline.
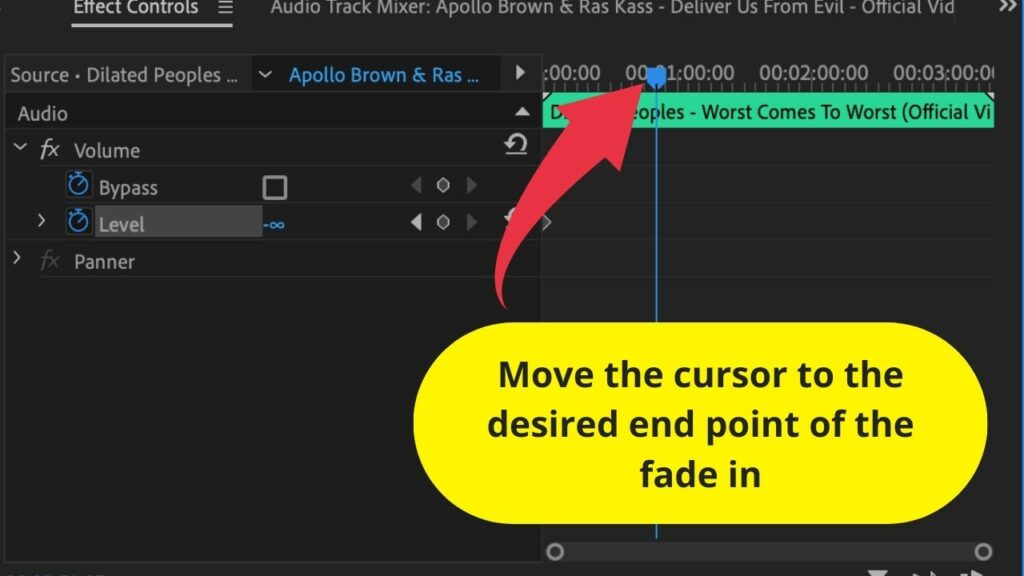
Step 5: Set the end point of your fade in. Move the cursor in your Effects timeline to where you would like your Fade in to end.
Step 6: Adjust the level. Hover over where it says dB and then by left-clicking and dragging you can adjust the dB. Set it to 0 dB or something similar. You can also double-click on the dB display and set the value by typing in the desired dB on your keyboard. You should then see a second keyframe appearing in the Effects timeline.