How to Lower Audio in Premiere Pro
There are 3 main ways to lower the audio volume in Premiere Pro. The first way is to lower the audio volume of individual tracks by using the “Audio Track Mixer.” The second way is to lower the volume of individual audio clips in the Audio Clip Mixer. The third way is to lower the volume of all audio by lowering the volume of the mix track.
How to Lower Audio in Premiere Pro using the Audio Track Mixer
The way audio works in Premiere Pro and most other professional software is that each project contains multiple audio tracks.
This makes your life much easier because having your audio on multiple audio tracks instead of just having them on one audio track allows for much more freedom when it comes to audio editing.
Let’s say you are working on a video in Premiere Pro and the story is narrated by 3 different people.
In that case, it makes the most sense that the audio for each speaker is on a separate track because these pieces of audio are all independent from each other and should, therefore, also be editable independently from each other.
For instance, you may find that Speaker 1 has a louder voice than Speaker 2.
Now, when you lower the volume for Speaker 1, you obviously don’t want this to affect the audio of Speaker 2.
And the easiest way to manage these sorts of things is having different audio tracks for different pieces of audio.
Let us now have a look at how to lower (or also increase of course) the volume of any audio track in Premiere Pro.
Step 1: Open up the Audio Track Mixer.
The Audio Track Mixer is typically located in the top left corner of the screen. If you can’t find the Audio Track Mixer, you can go to “Window” in the main menu and then click on “Audio Track Mixer” and it should then appear (be added to the section in the top left corner of the screen).
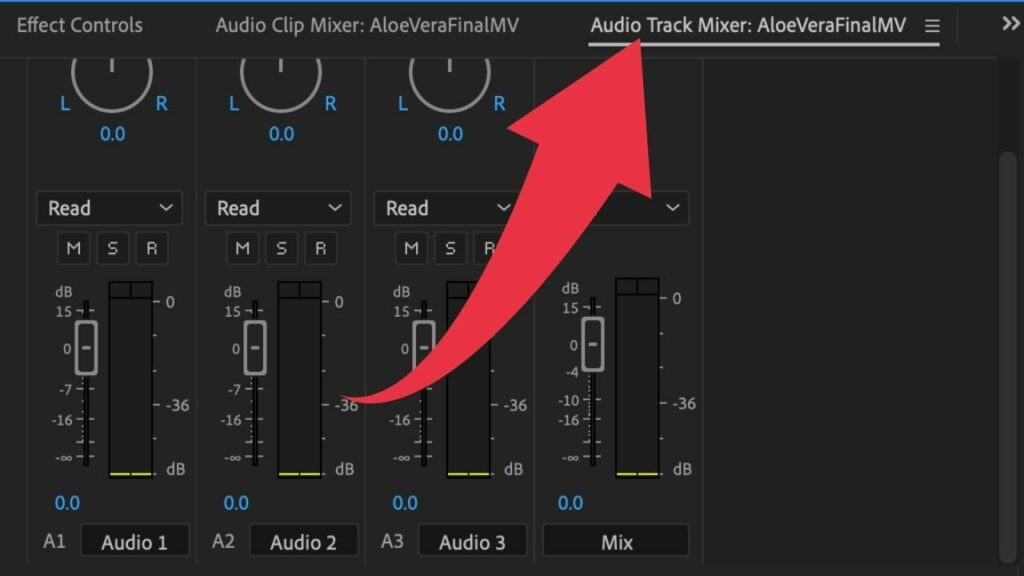
Step 2: Lower the volume on any given track by using the audio track fader.
For each audio track that you have in your project (timeline), you will see a representative audio track in the Audio Track Mixer panel. That said, if you wish to lower the volume for audio track 2 (timeline), then you would go to Audio Track 2 in the Audio Track Mixer and then drag the fader of that track down to reduce the volume.
Whenever you would just like to lower the volume of a specific clip in Premiere Pro, you can simply adjust the audio volume of the clip in question.
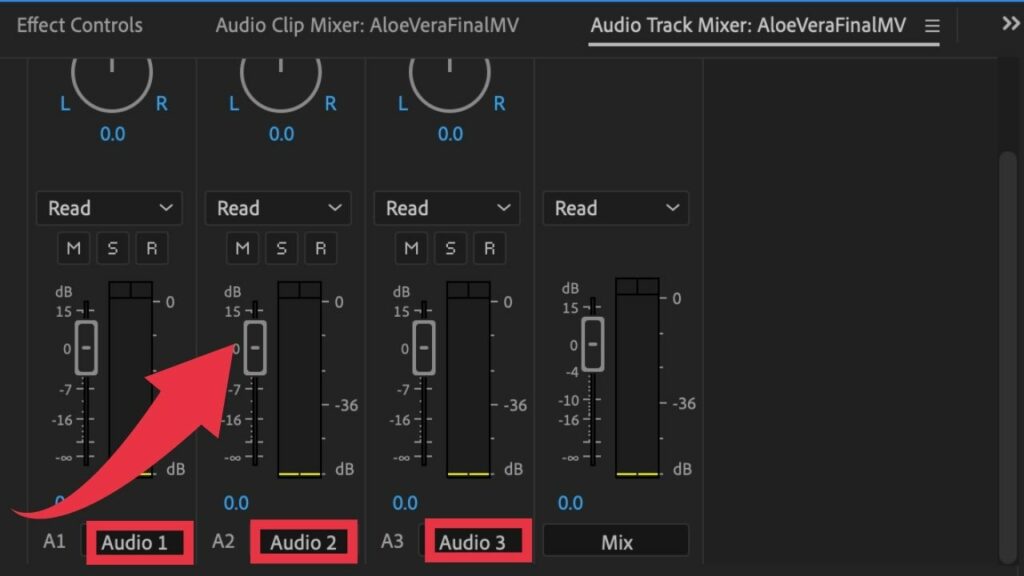
How to Lower the Audio Level of Individual Clips in Premiere Pro
There are two ways you can do just that. You can either lower the volume of a certain clip in the timeline itself or you can go into the Audio Clip Mixer and lower the volume there.
I usually do this directly in the timeline because it’s just way faster.
Step 1: Left-click and Drag Down in the middle of the audio clip (in the timeline!) to lower the audio volume of that very clip.
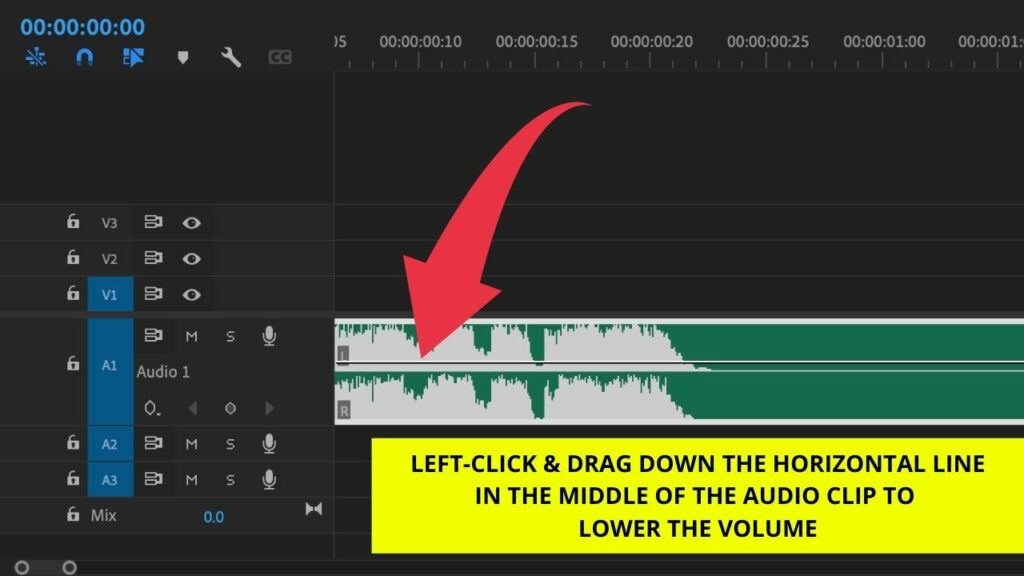
The fastest way to lower the audio volume of any clip is to do it directly in the timeline panel. Simply left-click on the horizontal line in any given audio clip and then drag down to lower the audio volume of the whole clip.
This will only change the volume of the clip but not the overall volume of the audio track that very clip is on. Please always keep that in mind!
How to Lower the Master Volume (the Volume of the Mix Track) in Premiere Pro
Whenever you would like to adjust (be it lowering or increasing) the volume for ALL audio in your project, you can do so by using the fader of the master track.
Typically, you would only mess with this fader at the very end of the audio editing process. It is called Mix Track for a reason, I guess.
For instance, you might find that your audio is clipping and that could be a reason for you to lower the master fader altogether to make sure that the audio always stays in a “safe range.”
You could, of course, also use a Limiter for that purpose but let’s just not overcomplicate things for the moment.
Step 1: Locate the Mix Track in your Timeline
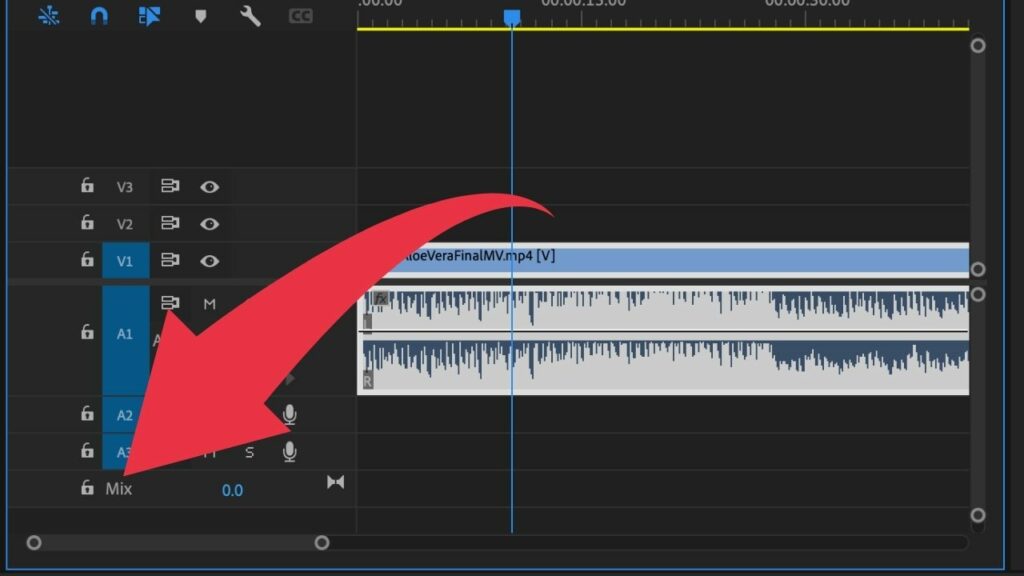
The Mix Track is usually located at the bottom of all your audio tracks in the timeline. You can also find the Mix Track in the Audio Track Mixer but adjusting the Volume directly in the Timeline is usually faster.
Step 2: Lower the Mix Track Volume
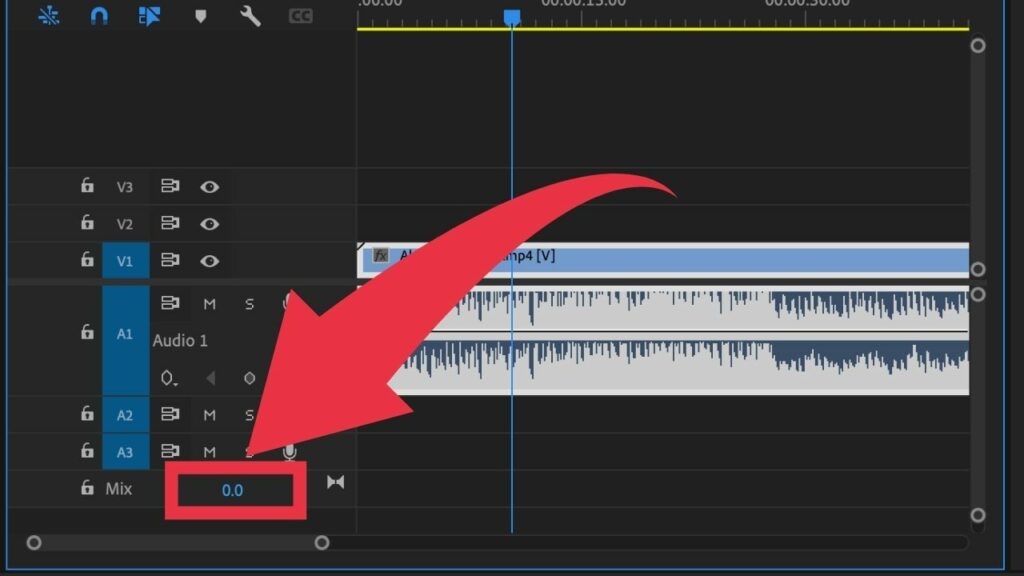
To adjust the volume, simply hover over the blue number and then drag it down to lower the volume of the mix track. Please keep in mind that this will lower the audio volume of ALL audio in your project. Use with caution:=)
