
1. Your Basic Premiere Pro Audio Settings Are Messed Up
This is probably the most likely reason.
Regardless of what setting may be misconfigured, the first step we need to take here is to actually find out if there is some signal or not.
Or, in simpler terms: We need to check if Premiere is actually outputting some sound or not.
Because chances are that Premiere is actually doing its thing but you just don’t hear it.
This is pretty easy to verify.
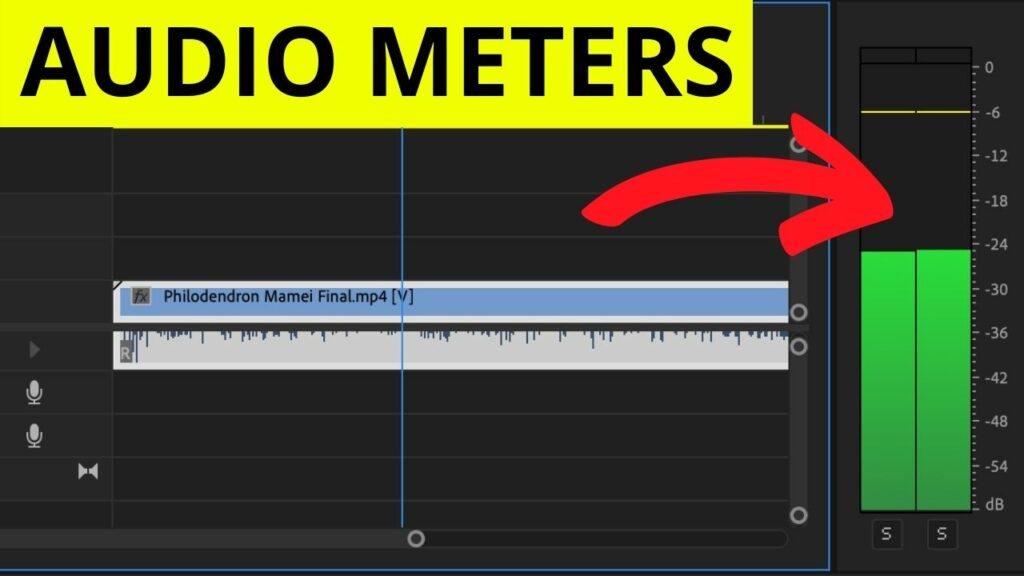
To do so, play the video (or whatever it is) and observe the Audio Meters.
Typically, you see the audio meters on the right side of your timeline.
In case you don’t, go to “Window” in the main menu and select “Audio Meters.”
Now, while playing back your footage, observe whether you got some activity going in the audio meters panel.
If you do have activity in there (= you see green/red bars jumping up and down in there), then Premiere is actually outputting sound.
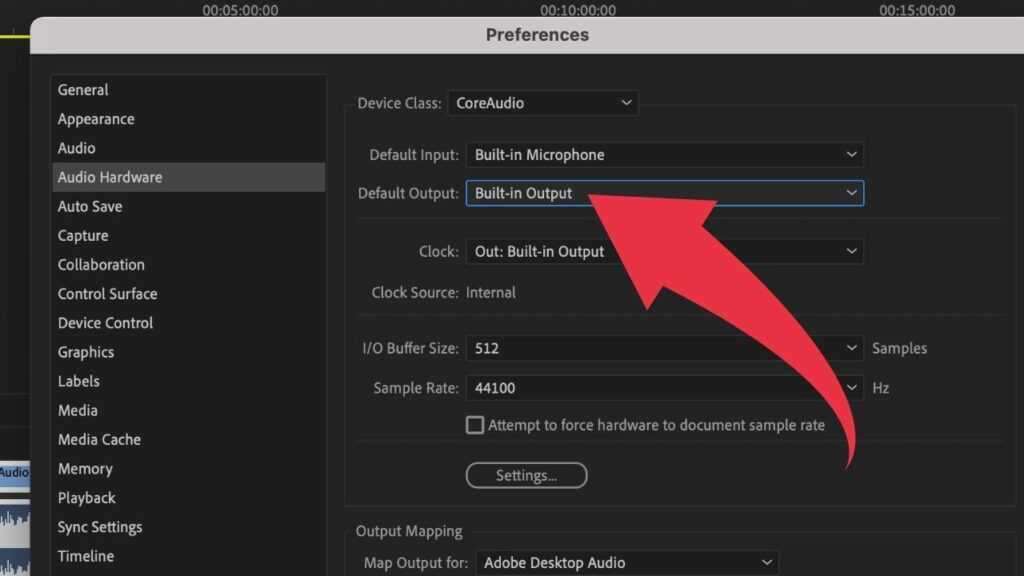
What you should do in this case is to check your Default Output under “Premiere Pro” –> “Preferences” –> Audio Hardware. Make sure this is set right. For instance, if you are on a laptop (Mac) and simply want to hear the audio through your Mac’s speakers, then make sure that “Built-in Output” is selected.
Also, if you have earphones connected to your Mac, this should still be set to “Built-in Output” for you to hear the audio.
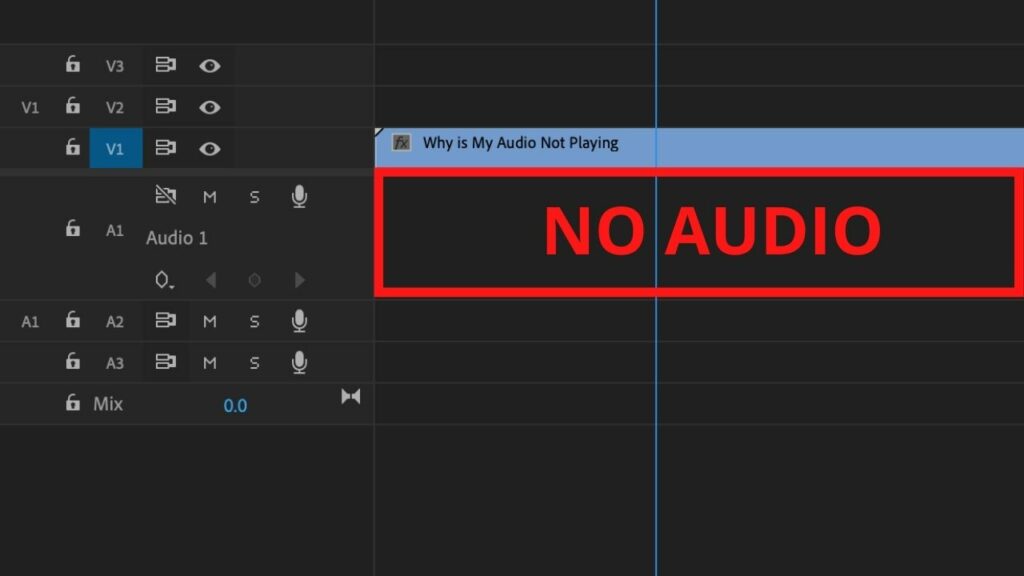
In case you don’t see any activity at all in the Audio Meters panel, the problem is of other sorts.
It basically means that there either is no sound in the footage/clip that you are trying to play back at all or that the track/footage is muted or that the volume is set to 0 (either at the individual audio track level or the mix track level.
That are a lot of “or’s”, I would have to agree.
But that’s the game we play whenever we use professional software such as Premiere Pro or similar products such as DaVinci Resolve or maybe something like Final Cut Pro.
2. Your Audio Did not Make it to the Timeline
In some cases, your audio won’t play back because it simply did not even make it onto the timeline.
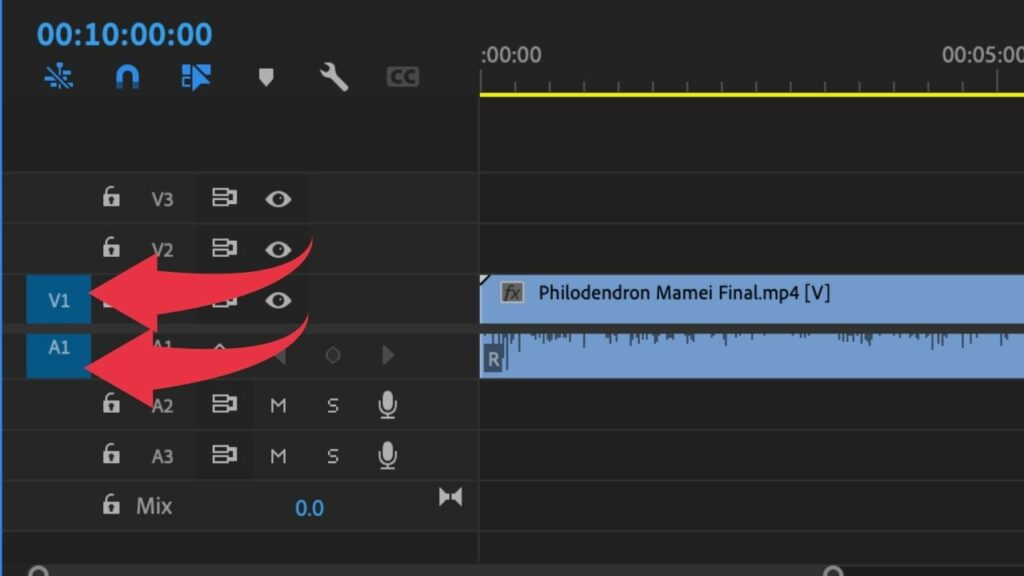
Usually, when you drag a video onto the timeline, then the video, given that there is linked audio, will be automatically split into a video clip and an audio clip.
And these clips will be placed on different tracks (the video clip will be placed on video track 1 and the audio clip will be placed on audio track 1).
Now, if you are not careful, it can happen that only the video clip actually makes it onto the timeline when dragging the video from the project panel onto the timeline.
For the longest time, I couldn’t find out why this actually happens….which was incredibly frustrating.
But now I know.
The magical word (well, two words) here is Source Patching.
Ok, great. What is that supposed to mean? Let me show you step by step in the next section
How to Adjust Source Patching in Premiere Pro
Well, on the timeline, on the very left to be precise, you can toggle on/off “Source Patching” for each individual video and audio track.
Source Patching takes care of inserts and overwrites.
So, that means that with Source Patching you can actually channel your inserts and overwrites.
For instance, if you would like your video to go on video track 2 on your timeline, then you would activate Source Patching for video track 2. And only for video track 2!
The same is true for audio. If you want your audio to go on audio track 2, then make sure that Source Patching is activated for Audio Track 2 and so on and so forth.
Now, the reason why audio sometimes does not get placed properly (well, not placed at all) when you drag your lovely video onto the timeline is that you probably have Source Patching turned on for a specific video track while NOT having activated any Source Patching for any audio track.
What happens, in this case, is simply that the video will be placed according to the Source Patching but the audio will not be inserted onto the timeline at all because Premiere does not know what to do with it because you did not activate any Source Patching for any audio track.
3. Your Audio Track is Muted
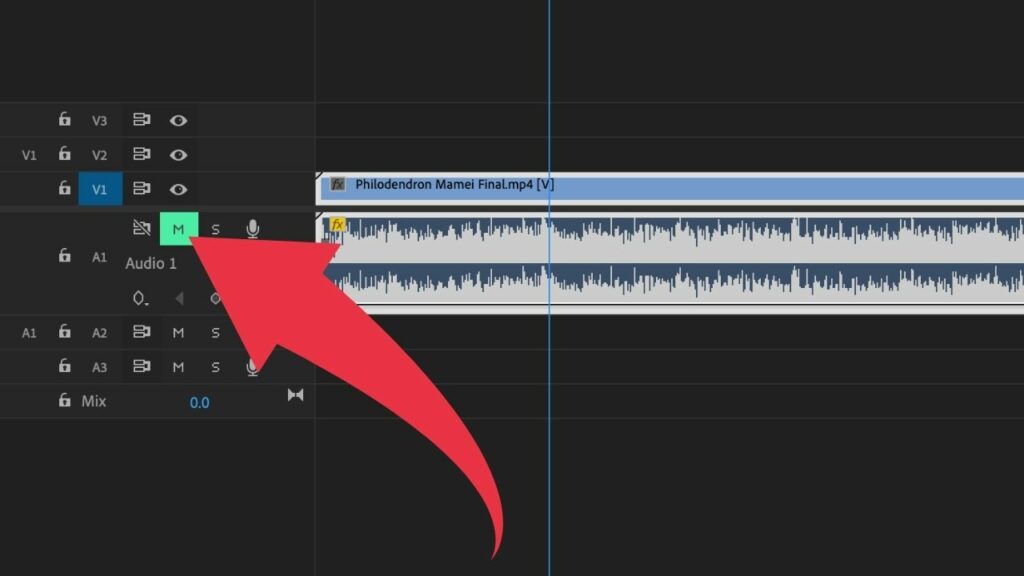
Yet another reason why your audio is not playing in Premiere Pro could be that your audio track is actually muted. If that is actually the case is very easy to verify.
How to solve the muted audio track problem in Premiere Pro
On the timeline, watch out for a little “M” symbol. Each and every track has this. If the “M” is on a green background, then the track is actually muted. Simply click on it to unmute.
4. One of Your Audio Tracks Is Playing in Solo Mode
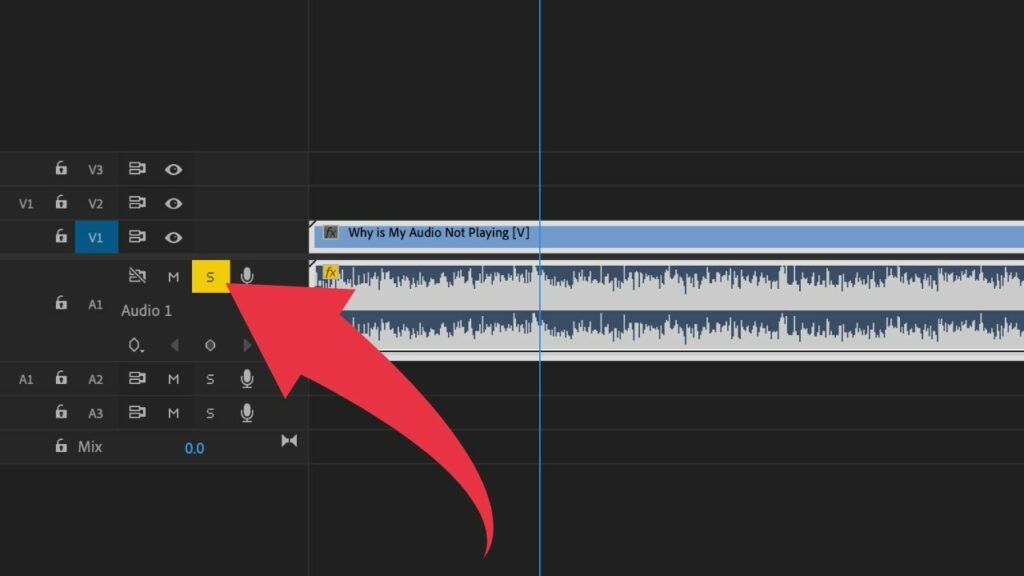
If just part of your audio is not playing, then the reason for that could be that you are playing one of your audio tracks in SOLO mode.
What this does is that only one specific audio track will play.
That said, if you can hear your voiceover but can’t hear the background music, then it could be that your playing back the voiceover in SOLO mode.
To hear all the sound/music again, make sure to deactivate SOLO mode.
How to Deactivate Solo Mode in Premiere Pro
You can find the SOLO Mode button on the timeline.
In fact, each and every audio track has it. It is located just next to the Mute button.
The Solo button is visualized by the letter “S”.
But how to know whether SOLO mode is activated or not?
Easy. If the “S” has a yellow background, then SOLO mode is active for that particular track. Whenever there is no yellow background for the Solo Mode button, then Solo Mode is not active.
cialis canada free sample
Tuesday 9th of January 2024
cialis canada free sample
cialis canada free sample