How to Separate Audio from Video in Premiere Pro
There are two main ways to separate audio from video in Premiere Pro. First, you can separate the audio from the video before you actually drop the video into the timeline by double-clicking on the video and then by selecting “Drag Audio Only.” Second, you can unlink the audio from the video by right-clicking on the video clip in the timeline and then by choosing “Unlink.”
Separating Audio from Video before you actually Drop Your Video onto the Timeline
I am sure you have noticed that whenever you drop a video onto the timeline, then Premiere Pro automatically splits your video into a video track and an audio track.
Why?
Because that is what people usually want. Most of the time, you just want to edit a video and also edit the audio that goes with the video without actually using any other audio to go with your video.
However, in some cases, you’d want to either completely remove the audio or maybe you just want to use part of it or maybe just change the position of the audio track.
That’s certainly also doable in Premiere Pro.
And here’s how you do just that:
Step 1: Drag & Drop your video file into the Project panel

Locate the desired video on your computer. Then simply drag it into the Project area. If you don’t see the Project window, select “Window” from the main menu and then choose “Projects.”
Step 2: Double-click on your video file in the Project panel
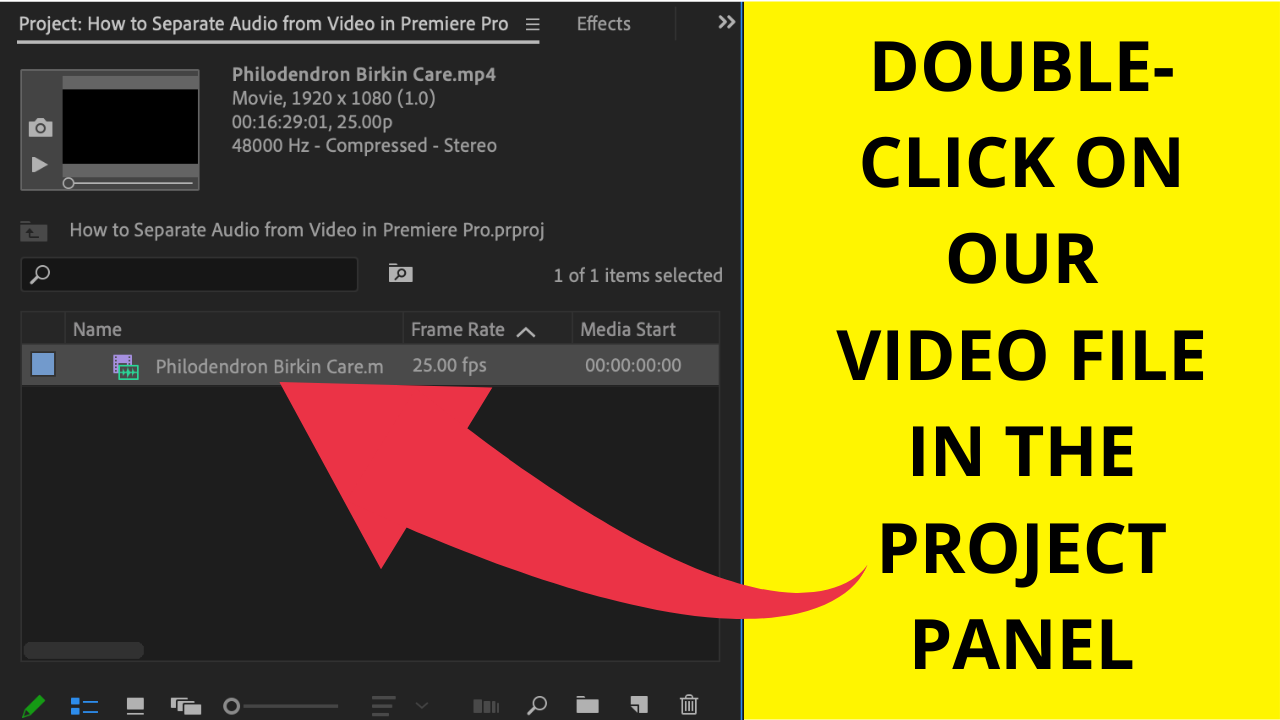
Double-click on your video file in the project window. This could be an MP4 video or something similar. You will then see your video appearing in the “Source” window. If you don’t see the Source window, select “Window” from the main menu and then select “Source.”
Step 3: Click & Drag where it says “Audio only” and drag onto the timeline.
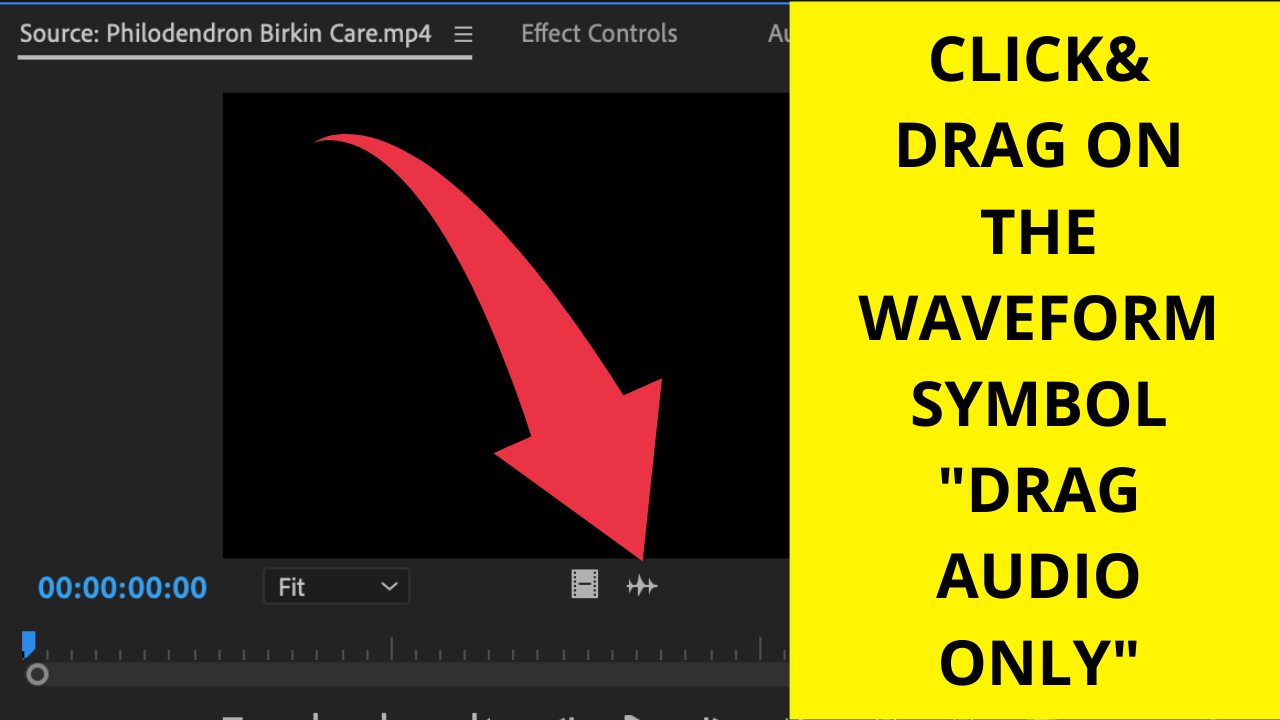
Now, below the preview of your video in the Source panel, you will see two icons. The left icon shows a video scroll and the right icon shows a waveform. If you would like work with audio only, all that is left for you to do is to click&drag on the waveform and drag it onto the timeline. Like this, only the audio will be taken over to the timeline. You can then start editing and using your audio independently.
Separate Your Audio from Video in the Timeline
In case you already have your video footage with the linked audio on your timeline, then it will be easier for you to use this second method to separate audio from video in Premiere Pro. Here’s how you do it:
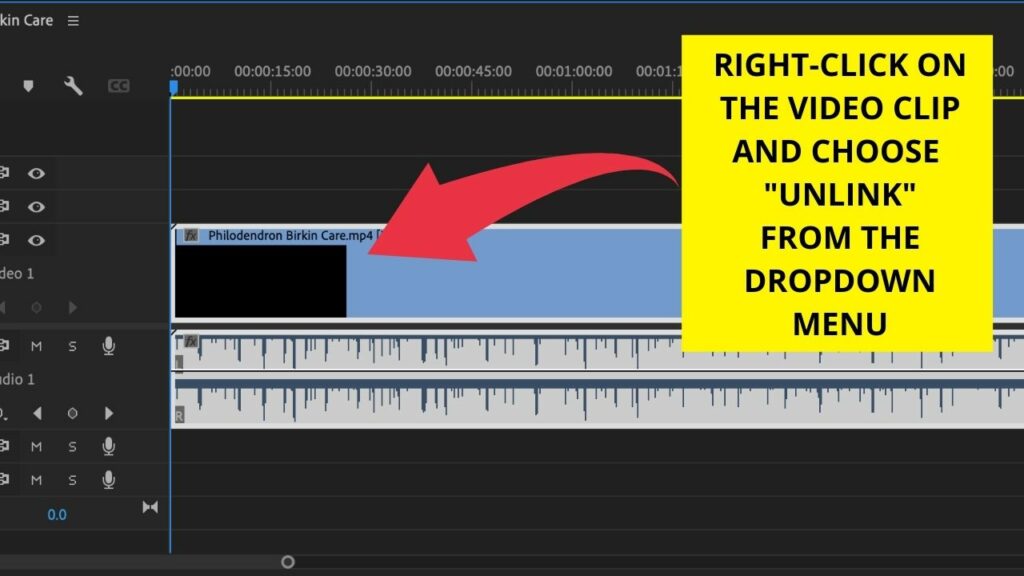
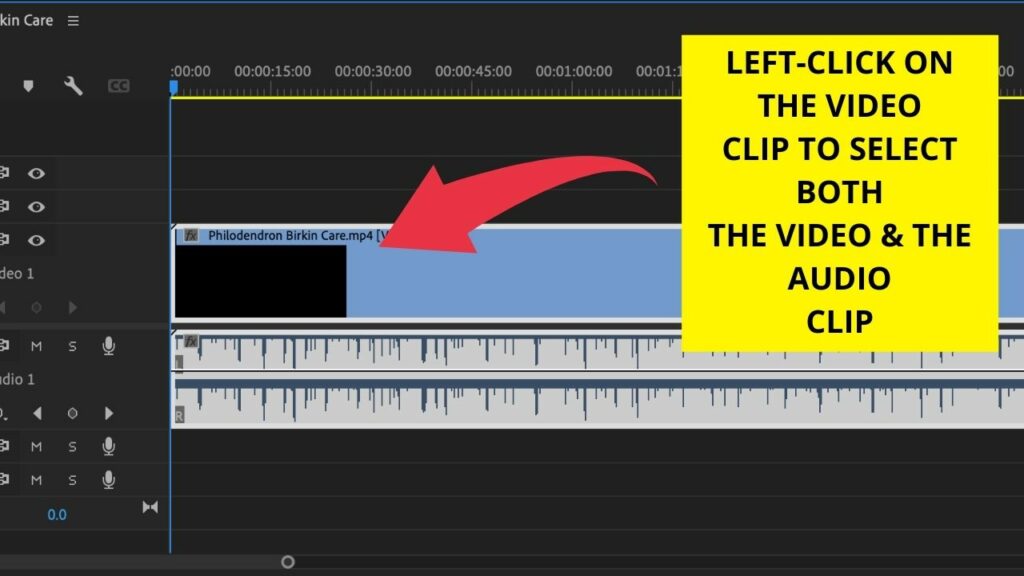
Step 1: Left-click on the video clip in your timeline to select/highlight it.
On the timeline, simply left-click on the video that you would like to detach the audio for. Both the video and the corresponding (linked) audio track will then be highlighted in white.
Step 2: Right-click on the same video clip and choose “Unlink” from the Dropdown menu.
Once you clicked on “Unlink,” you can then move the video and audio file independently.
Now, when you click on the audio clip, you will notice that only the audio clip will be highlighted in white. Before clicking on Unlink, regardless of whether you would click on the audio clip or the linked video clip, both of the clips would be highlighted and selected together.
To reverse this change or to link other audio & video clips together, you can simply select the audio & video clips in question and then either click on the audio or the video clip and then select “Link” and the clips will be linked together (again).